Roofing shingles are the most common material used for building roof constructions in many parts of the world. Despite their widespread use, however, not many home owners have a clear idea of what a new roof will cost, or what the best roofing shingles are, or where they can find the best deals on roof shingles.
Read More Roofing Shingles Articles
- Roof Shingles Calculator
- Metal Roof Vs Shingles
- Replacing Roof Shingles
- Roof Shingles Prices
- Shingle Roof
After researching online for many months, one thing was glaringly obvious. There was a need for a comprehensive resource about roofing materials and especially a roofing shingles price guide.
Home owners wanted to learn about roofing contractors and the two factors that impact cost – the materials used for building, and the labor required to install a new roof.
There really is no reason why roofing prices should be so diverse across the world. Granted that there are regional differences in the rates charged by manufacturers for various types of roofing material, it should be relatively simple to arrive at a ballpark roofing estimate – but in practice, that isn’t possible.
Manufacturers present their wares in confusing and opaque fashion so that you’ll need to strain your brain to come up with the information that you require. Contractors deliberately mask their roof shingles price quotes in jargon and include (or exclude) different elements of the project, making it harder than necessary to do a point-by-point comparison.
Helpful Tips On Roofing Shingles Prices
The typical cost of roofing shingles varies from $140 to $175 per 100 square feet, but when it comes to your unique situation, this isn’t very helpful – as many home owners painfully discover.
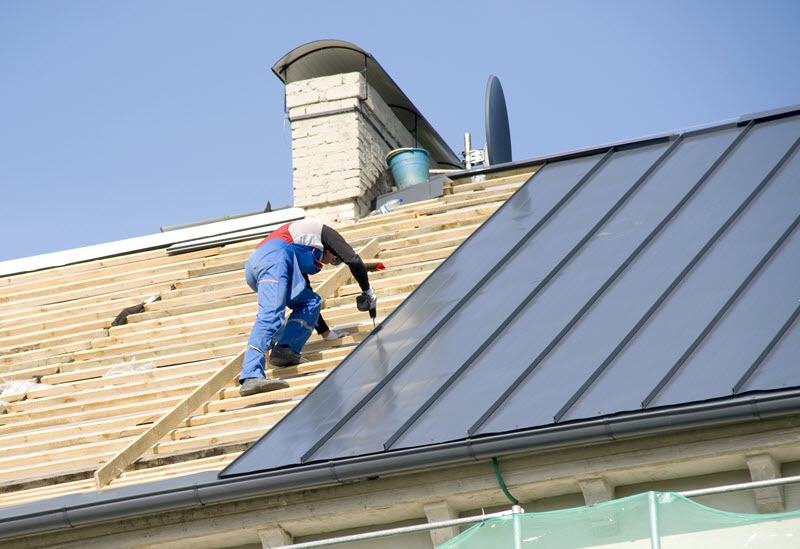
Labor expenses diverge widely from place to place. The work is difficult, dirty and even dangerous. Skilled personnel are scarce, especially if you’re planning a special kind of roof with architectural shingles or high tech roof materials like solar powered roofing shingles.
Factors pertaining to your own building also will affect your cost. A steep roof is harder to shingle, and your roofing contractor will charge more for the job. Uneven roofs with many dips and valleys will cost more to cover. Replacing a roof when it becomes old and disposing off the waste material can add to your roofing expense.
This site will strive to explore various elements of roofing shingles and roof replacement or repair. Our detailed and impartial analysis will provide you with the information and resources necessary to make an informed choice.
Useful Resources About Roofing Options
If you have specific questions or looking for a particular type of information, please let us know so that we can tailor our content to match your interests and requirements.
Hopefully you will be able to find answers to all your roofing questions right here at the AGUA HOME IMPROVEMENT Roofing Shingles Price Guide website.
Roofing Shingles
Steps Before Laying Roofing Shingles
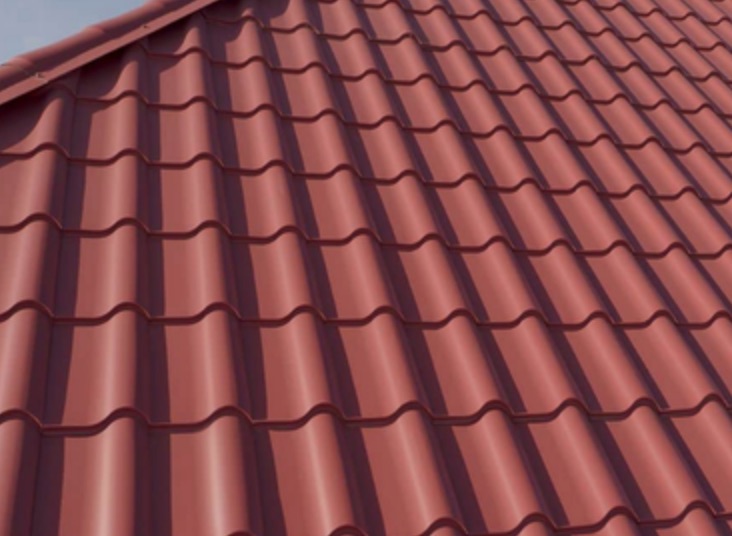
Roofing shingles are an important choice for any home.
After all, they’ll form a barrier against rain, snow and moisture protecting your wood work, the dry walls and the expensive interiors. Even a minor leak can be big source of worry for a homeowner.
But that isn’t all. Once you’ve made up your mind to use roofing shingles, the next thorny question arises… Installing the roofing shingles.
More About Roofing Shingles Estimates
- How Much Does a Roof Cost?
- GAF Roof Shingles
- Free Roofing Estimates
- Metal Roofing Cost
- Commercial Roofing
Laying the roofing shingles is a task that needs to be done with care and attention to detail. There are different types of shingles to choose from but the most commonly used ones are the asphalt shingles. These last for 20 years or more. So, if the job of laying the roof is well-done then you don’t have to worry about it for a long time.
Here we will discuss the various aspects of laying roofing shingles.
Tools Needed For Laying Roof Shingles
First, if it is a brand new home then you will be laying the shingles for the first time. If it is an older home which needs a replacement of roof shingles then the old layer needs to be ripped out. The square edged garden shovel and a pry bar from your tool shed are the main requirements for removing old shingles.
However, if it is a professional who is doing this job then they will use special tools which look very much like the garden shovel but with a jagged edge. This tool is called a roofer’s shovel or a shingle remover. It’s their job and the special tools makes their job that much easier.
Laying roof shingles will involve a lot of lifting and raising of tools and materials to your roof. You will need a ladder with various extensions for the job. A professional will have the ladder jacks, and 2×10’s which will be needed to help the roofer reach the heights, to sit or to walk around while working.
If you are doing this job yourself, you should be able to hire the required tools. Ladder hooks and scaffolds are other useful items that can be easily rented.
Hammers for nailing the roof shingles are another important tool. Any heavy hammer will do but if you are buying one especially for the job, then check out the heavier ones with flatter claws which help remove the bent or broken nails more easily.
A knife is another essential tool that any roofer needs. You will need it for cutting the shingles, the felt paper and underlayment. A good quality utility knife is a must for a roofing job. You will need a metal cutter like tin snip to help cut the metal sheets, flashing and drip edges.
Have a lot of spare blades for your knife as you will be cutting a lot of shingles and the blade will quickly get blunted.
Don’t Miss These Roofing Shingles Reports
Materials Needed For Roof Shingles
Before you go shopping for roofing shingles of your choice, you need to know the surface area of your roof.
Measure the lengths and breadths to get the surface area of the roof. Add up the surface areas of the rectangular portions and triangular portions, the dormers and gables to get the approximate amount of shingles needed.
Asphalt shingles come in bundles. Each bundle contains 100 square foot of shingles in rectangular strips. Just strips off the plastic covering the adhesive and lay your shingles.
You will need plenty of nails to lay your roof shingles. Roofing nails are flat topped and short. They come in different lengths. If you have underlying layer of shingles then you will need slightly longer nails. Each shingle needs 4 nails or more.
Each bundle of shingles has around 81 shingles. So, depending on the number of bundles you buy you will need a minimum of 4 times 81 nails for each bundle. Factor in extra nails for damaged or broken nails while working and also for laying out the flashing and drip edges.
Felt paper is first laid out on the roof before the shingles go on it. This is available in rolls and different lengths. Buy as much as you need for your roofing job. Roofing felt paper comes with lines running in the middle of them. This helps to line up your shingles.
Drip edges and flashing are thin metal sheets. Drip edges protect the edges of the roof and help keep the moisture away from shingles edges. Flashing is used around chimneys and other openings like pipes to seal it off against water seepage.
You also get rubber gaskets to completely seal it off. Buy according to size and shape needed.
How To Remove Your Old Roof Shingles
Old roof shingles will need to be removed only if there is more than one layer of them. If there is only one layer then you can lay the new shingles right on top. Two layers or more will cause extra load on the structure for which it is not designed.
Shingles have to be removed from top down. Use safety harness when accessing dangerous edges or steep slopes. The shingles once removed needs to go a landfill.
If the flashing, drain pipes and drip edges are in good order then there is no need to remove them. Make sure to see that they are no cracks or breakages. Just work around them carefully. If you need new vents or skylights, now is the time to plan for it.
In a new home you will have to start with a layer of plywood or OSB. Lay them in a brick pattern. For an older home these will already be in place. If you see any boards rotting, remove and replace with new boards. You could also a new OSB sheath. Cut out the vents and holes that you need on your roof.
More Information About Roofing Shingles
If your roof has valleys where two sections of the roof meet and form a line then you will need a layer of metal flashing on these junctions. The flashing comes with a crease in the middle or you can make it yourself.
Just make sure to work with sheet metal while wearing heavy duty gloves. The metal edges are sharp and can cut through skin. Nail it in place starting at the bottom and working your way upwards.
Once that is done go ahead and add the drip edges all around the roof edges. There should be over hang of the drip edges and the widest part of it should go on top part of the roof and the bottom edge should rest on the plywood placed at the bottom. Nail at intervals on the top.
Lay the felt paper starting from the bottom. Lay the felt just before placing the shingles as it is likely to get damaged due to walking or moving around.
Now, comes the important part of laying the actual roof shingles. Place the 3-tab roof shingles starting from the bottom overlapping the drip edges and work your way to the top laying them around the chimneys and vents and nailing the roof shingles firmly to the board under.
If all of this sounds too difficult or beyond your skills, don’t worry. Reach out to one of our helpful and trusted roof contractors for a quote. You have no obligation at all, so feel free to fill in the contact form and ask an expert to help you out.


